

Light up your LEGO modular display like a pro
There’s a moment every LEGO collector knows well: you finish a modular building, step back to admire it, and something feels off. The architecture is stunning, the color blocking is perfect, but the whole thing looks flat. Lifeless. Like a movie set with no stage lighting. Lighting choices make a major difference in display ambience and in how your LEGO builds photograph, and that gap between “impressive” and “jaw-dropping” almost always comes down to illumination. This guide walks you through every stage of the process, from picking the right materials to troubleshooting your finished setup, so your modular display finally looks the way it deserves to.
Table of Contents
- What you need: Essential tools and lighting kit options
- Planning your lighting layout: Color, placement, and realism
- Step-by-step installation: Bringing your display to life
- Testing, troubleshooting, and adjustments for perfect results
- Why every LEGO modular display deserves custom lighting
- Ready to upgrade your LEGO lighting? Find the perfect kit
- Frequently asked questions
Key Takeaways
| Point | Details |
|---|---|
| Choose the right kit | Off-the-shelf kits are convenient but may need customization for large or unique displays. |
| Mind color temperature | Warm, neutral, or cool LEDs each create different moods, so choose consistently for realism. |
| Diffuse light for realism | Hide LEDs behind translucent elements or use diffusion to prevent visible hotspots and glare. |
| Test, tweak, enjoy | Carefully test your setup, troubleshoot any hot spots or wire issues, and adjust for the perfect effect. |
What you need: Essential tools and lighting kit options
Now that we know lighting can be transformative, let’s examine what you’ll need to get started. Having the right components before you begin saves you from mid-project trips to the hardware store and prevents the frustrating experience of discovering a key piece is missing halfway through your build.
Core tools and components:
- LED light kits designed for LEGO scale (fiber-thin wires, micro LEDs)
- Diffusers or frosted tape to soften harsh LED points
- Translucent LEGO bricks in white, yellow, or light blue for window effects
- Extension wires to bridge gaps between modules in a long street layout
- Battery packs or USB power adapters for clean, reliable power delivery
- Tweezers and a brick separator for precision placement inside tight spaces
- Small cable clips or rubber bands to manage wire routing during assembly
The choice between a pre-made kit and a fully DIY approach matters more than most beginners expect. Pre-made kits are fast, color-matched, and come with instructions. DIY setups using individual LED components give you granular control over placement and brightness but require more planning time.
| Feature | Pre-made kit | DIY modular lighting |
|---|---|---|
| Setup time | Fast (30-60 min) | Slow (2-4+ hours) |
| Customization | Limited | Full control |
| Wire length flexibility | Fixed lengths | Fully adjustable |
| Cost | Moderate | Variable |
| Best for | Single sets | Large custom layouts |
| Skill required | Beginner | Intermediate to advanced |
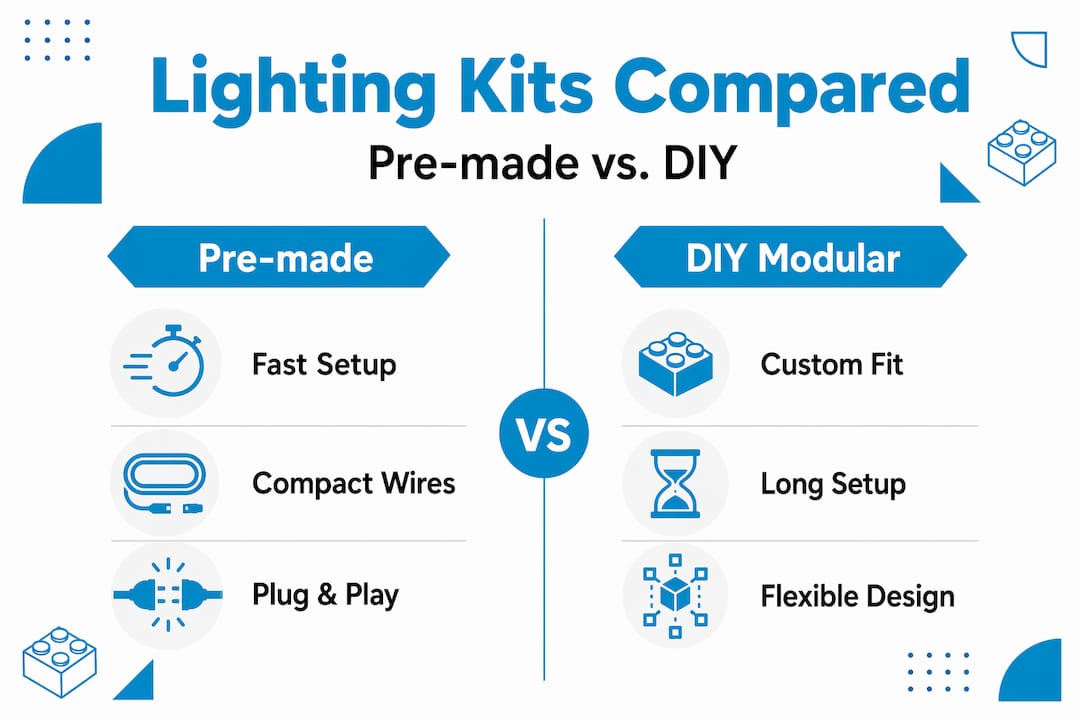
Pre-made lighting kits may not precisely fit every custom modular design, and string length can become a practical limitation for larger complexes. If you’re running a six-building modular street, a single kit’s wiring simply won’t reach every room. That’s when extension wires and modular power hubs become essential gear rather than optional extras.
Pro Tip: Before buying any kit, count the number of lit rooms or windows you want to illuminate and match that number to the LED count in the kit. Always buy one size up to leave room for creative additions later.
For single-set projects, purpose-built options like the Dubai Light Kit or the Ice Castle Light Kit take the guesswork out of compatibility entirely, since every wire length and LED placement is already calibrated for that specific model.
Planning your lighting layout: Color, placement, and realism
With materials ready, the next step is planning a lighting scheme tailored to your build. Jumping straight to installation without a plan is the single biggest mistake new builders make, and it shows in the final result.

Understanding light roles in a display:
Think about how real interior designers and photographers approach a room. They use three types of light working together. Key light is the main source, the brightest point that defines the space. Fill light softens shadows created by the key light. Diffused light scatters gently across a surface to create ambient warmth. Professional LEGO photographers use a mix of key and fill lighting, specific color temperatures, and strategic light placement to avoid unwanted shadows and the dreaded “Christmas tree effect,” where a build looks garish and overdone rather than inviting.
| Light role | Purpose | Placement in LEGO build |
|---|---|---|
| Key light | Primary illumination | Ground floor, main room center |
| Fill light | Reduce harsh shadows | Upper floors, side rooms |
| Diffused light | Ambient warmth | Behind translucent bricks, ceilings |
| Accent light | Highlight details | Storefronts, signage, streetlamps |
Choosing color temperature:
Color temperature is measured in Kelvin (K) and describes how warm or cool a light appears. For LEGO modular interiors, warm white (2700K to 3000K) mimics incandescent bulbs and feels cozy and lived-in. Neutral white (3500K to 4000K) suits commercial spaces like bakeries or shops. Cool white (5000K and above) works well for modern architecture or sci-fi builds but can feel clinical in residential settings.
What to avoid:
- Mixing warm and cool LEDs in the same room without a deliberate reason
- Placing RGB lights at full saturation, which creates unnatural color casts
- Leaving wires visible through window gaps or between brick layers
- Clustering too many LEDs in one area while leaving others completely dark
For diorama-style builds, the Dagobah Diorama Light Kit demonstrates how a single, well-placed light source can define an entire scene’s mood without overloading the build with unnecessary points of light.
Sketch your layout on paper before touching a single wire. Mark every window, every room, and every exterior detail you want to illuminate. Then assign a light role to each zone. This ten-minute planning step prevents hours of rework later.
Step-by-step installation: Bringing your display to life
Once your layout is sketched, it’s time to start installing your chosen lights. Following a structured sequence makes the difference between a clean, professional result and a tangled mess of wires that ruins the illusion.
Installation steps:
- Disassemble the relevant sections of your build to expose interior floors and walls. Never try to force wires through a fully assembled structure.
- Dry-fit your LEDs without connecting power. Place each LED in its planned position and run the wire along its intended path to confirm everything reaches and nothing looks awkward.
- Insert LEDs behind translucent bricks or diffusers. Routing LEDs behind translucent bricks or using diffusers prevents visible hotspots and improves window realism dramatically.
- Route wires along interior walls and through floor gaps, keeping them flat against surfaces. Use small clips or a dab of removable putty to hold wires in place during reassembly.
- Reassemble floor by floor, checking wire positions as you go. This is your last chance to make adjustments before everything is locked in.
- Connect to your power source and do a preliminary power-on test before the final floor goes on.
- Make adjustments to any LED that looks too bright, too dim, or poorly positioned. Swap in diffuser material where hotspots appear.
- Close up the build and do a final test under your display’s actual ambient lighting conditions.
Using parts-based DIY lighting allows for more control and avoids problems of fixed string lengths that might not match your model. This is especially valuable when you’re building a custom modular street that doesn’t follow any single set’s dimensions.
Pro Tip: Use a small piece of white LEGO tile placed directly in front of an LED to act as a natural diffuser. It scatters the light beautifully and costs nothing extra.
Safety reminder: Never pinch wires between bricks under pressure. Compressed wires can fray over time and create connection failures or, in rare cases, heat buildup. Always leave a small loop of slack wire at each LED point, and never connect more LEDs to a single battery pack than the manufacturer recommends. Overloaded packs run hot and drain fast.
For smaller builds or starter projects, the Mini Knight’s Castle Light Kit is an excellent first installation because the build’s open layout makes wire routing forgiving and easy to practice on.
Testing, troubleshooting, and adjustments for perfect results
With lights in place, a thorough test ensures your display looks incredible under any conditions. Testing is not a formality. It’s where you catch the problems that would otherwise ruin your finished display.
Test everything before final assembly:
Always power on your display in a darkened room first. Darkness reveals every problem: visible wires, uneven brightness, dead LEDs, and color mismatches that daylight hides. Then test again under your normal display lighting to see how the LEDs interact with ambient light in the room.
Common issues checklist:
- Wires visible through windows or gaps: Re-route behind bricks or use black wire variants where available
- Hotspots (bright, harsh LED points): Add diffuser material or swap to a frosted LED
- Mismatched brightness between floors: Check that all LEDs on the same circuit are rated identically
- Color temperature inconsistency: Color temperature shifts or uneven lighting can occur if installations are rushed or wires aren’t routed cleanly, so take time to match Kelvin ratings across all LEDs
- Flickering or dead connections: Check all connector joints and reseat any loose plugs
- Exterior lights washing out interior glow: Reduce exterior LED brightness or add a dimmer if your kit supports it
Adjustment strategies:
If a room looks too bright, don’t remove the LED. Instead, add a layer of translucent brick in front of it to cut intensity naturally. If a room looks too dim, check whether the wire run is too long for the LED’s rated voltage. Long runs can cause voltage drop, which dims LEDs at the end of a string. Adding a second power input point midway through a large layout solves this instantly.
Pro Tip: Photograph your display at each stage of testing. Camera sensors are more sensitive to light imbalances than your eyes, so photos reveal problems you’d otherwise miss until your display is fully assembled and much harder to fix.
The Slam Dunk Light Kit is a great reference for understanding how a single-room build should look when lighting is balanced correctly. Study the before-and-after effect to calibrate your own expectations for modular interiors.
Why every LEGO modular display deserves custom lighting
Here’s a perspective that most lighting guides won’t give you: the best LEGO modular displays aren’t the ones with the most LEDs. They’re the ones where the lighting tells a story.
A bakery module should feel warm and welcoming at street level, with a cooler, more functional light upstairs in the apartment. A detective’s office should have a single amber desk lamp casting long shadows across the room. A rooftop garden should glow softly at dusk, not blaze like a stadium. These effects don’t come from following a kit’s default instructions. They come from a builder who thought carefully about what each space is supposed to feel like and then made deliberate choices to create that feeling.
Off-the-shelf kits are a genuinely excellent starting point, and we’d never discourage anyone from using them. But treating a kit as the finished product rather than the foundation is where most displays plateau. The builders whose work stops people mid-scroll on social media are almost always the ones who went one step beyond the default, swapping one LED for a warmer tone here, hiding a wire more carefully there, adding a tiny accent light to a detail that the kit didn’t plan for.
The Mineral Collection Light Kit is a perfect example of how accent lighting on specific display elements creates drama that broad, even illumination simply cannot achieve. That principle scales directly to modular buildings. Light the things worth looking at. Let everything else fall into comfortable shadow.
Custom lighting is also part of the display’s long-term story. Builds change over time. New modules get added, layouts shift, and seasonal themes rotate in and out. A modular lighting system that you understand deeply, because you planned and installed it yourself, adapts with your display far more easily than a single fixed kit ever could.
Ready to upgrade your LEGO lighting? Find the perfect kit
Inspired to upgrade your display? Here’s how to get started with easy-to-use kits and advanced lighting solutions.
At BrickiloToys.com, we’ve built our entire catalog around the specific needs of modular display builders and diorama creators. Whether you’re lighting your first set or rewiring a twelve-building city block, we have options that fit your skill level and your vision.
The LED Lighting Kit with Remote gives you real-time brightness and color control without touching your build, which is ideal for displays that double as photography setups. For builders who want a clean, modular approach to interior lighting, the 1x4 LED Block Kit integrates directly into your brick layout with zero visible wiring. Browse the full range of all Brickilo lighting kits to find the right fit for your next project, with worldwide shipping and fast delivery so your display upgrade arrives when you need it.
Frequently asked questions
What type of LED is best for LEGO modular interiors?
Diffused or soft white LEDs behind translucent bricks give the most realistic and pleasant interior light, since routing LEDs behind translucent bricks improves realism and eliminates visible hotspots.
How do you avoid the “Christmas tree effect” with RGB lights?
Use single-color LEDs and match color temperature throughout the display. Using RGB can cause a garish “Christmas tree effect” and inconsistent color temperature shifts that undermine the realism of any modular scene.
Why might my pre-made lighting kit not fit my entire modular street?
Fixed-length light strings may not reach through large modular complexes. Longest available light strings of around 30 cm can be limiting, so larger layouts require extension wires or a custom multi-input setup.
Can lighting be added after a build is complete?
Yes, but installation is much easier when you plan and route lighting during assembly. Retrofitting a finished build means disassembling sections anyway, so planning ahead saves significant time and frustration.